Assignment4
Due on 2/17 11:59 pm (PST): See Submission for details.
GitHub Classroom link for 154B: https://classroom.github.com/a/ZD8qXu0S
GitHub Classroom link for 201A: https://classroom.github.com/a/JTDRGnbs
Table of Contents
- Introduction
- Research question
- Workload
- Experimental setup
- The Experiments
- Submission
- Grading
- Academic misconduct reminder
Introduction
In this assignment, you’ll be investigating the performance impacts of different cache architectures and different algorithm designs on matrix multiplication. The goals of this assignment are:
- Show how algorithms have different behaviors as the microarchitecture changes.
- Show how changing the algorithm can change performance on the same microarchitecture.
- Improve your understanding of cache architectures.
Research question
How does the cache hierarchy and the algorithm design affect the performance of matrix multiplication?
To answer this question, you will have to implement different matrix multiplication algorithms and run them on different cache hierarchies.
Workload
In this assignment, you are going to implement different techniques for multiplying matrices.
All the ready-made workloads discussed require one input argument.
You will have to pass matrix_size as an input argument to the constructor of a workload (__init__) which describes the size of matrices A, B, and C.
When running the workload on native hardware (e.g., your host machine), you should pass the same one argument in the command line following the name of your binary.
NOTE: for all the parts of this assignment assume:
$C = A \times B$
You will have to implement different techniques for matrix multiplications to see the effect of software implementation on the overall system performance. Below you can see a short description of your starter code.
Base matrix multiplication algorithm (C stationary, or ijk)
In programming, matrices are stored as two-dimensional arrays. Otherwise, a matrix is stored as an array of arrays. There are two ways how a matrix could be stored this way.
- Row major order: the matrix is represented as an array of the rows of the matrix. Each row is then stored as an array that includes elements from consecutive columns in the row. With this order, consecutive access to the elements in a row exhibits spatial locality.
- Column major order: the matrix is represented as an array of the columns of the matrix. Each column is then stored as an array that includes elements from consecutive rows in the column. With this order, consecutive access to the elements in a column exhibits spatial locality.
Below is a simple implementation of matrix multiplication given in workloads/matmul/ijk_multiply.h.
For this assignment, assume that all A, B, and C matrices are stored in row-major order.
I.e., matrices are indexed like A[row number][column number].
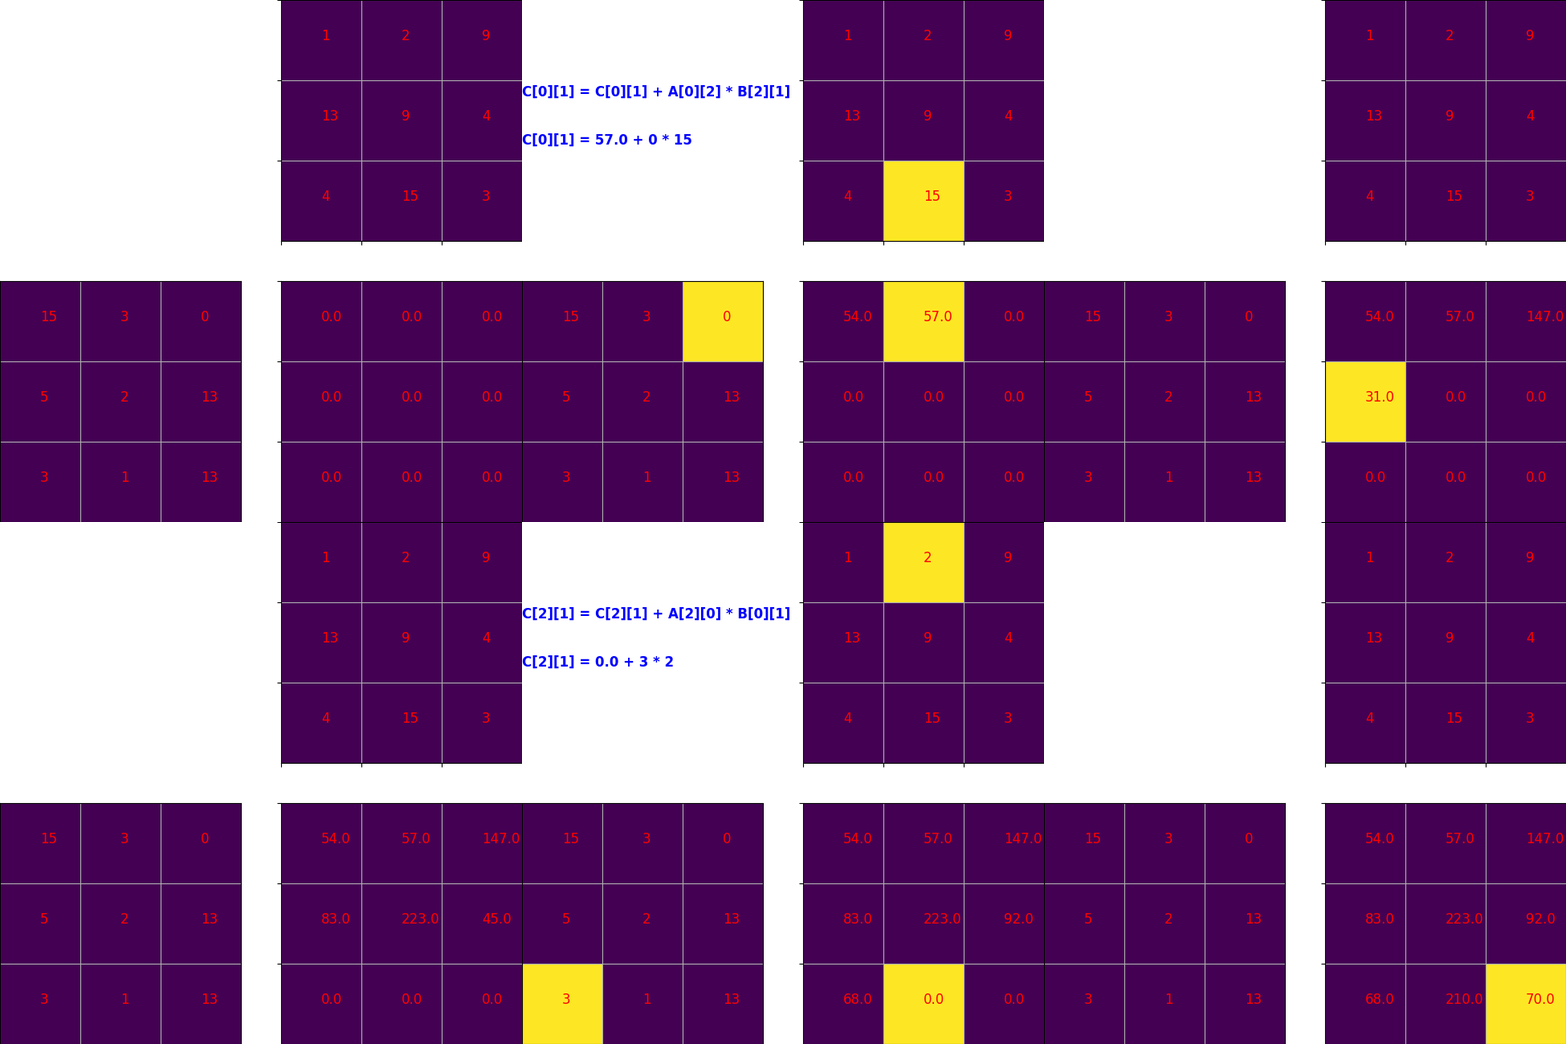
The starter code first iterates over the rows of A (i), then iterates over the columns of B (j), and then iterates over the elements in the selected row and column (k).
void multiply(double **A, double **B, double **C, int size)
{
    for (int i = 0; i < size; i++) {
        for (int j = 0; j < size; j++) {
            for (int k = 0; k < size; k++) {
                C[i][j] += A[i][k] * B[k][j];
            }
        }
    }
}
The animation below shows how the order of operations during the multiplication operation.

You can import this workload into your configuration script using obtain_resource("mm_ijk_run").
However, if you need to compile your own binary, you can run the command below in workloads/matmul.
make mm-ijk-gem5
CAUTION: The above command generates a binary that could only be run with gem5. Running these binaries on your host will result in errors.
A stationary matrix multiplication (ikj)
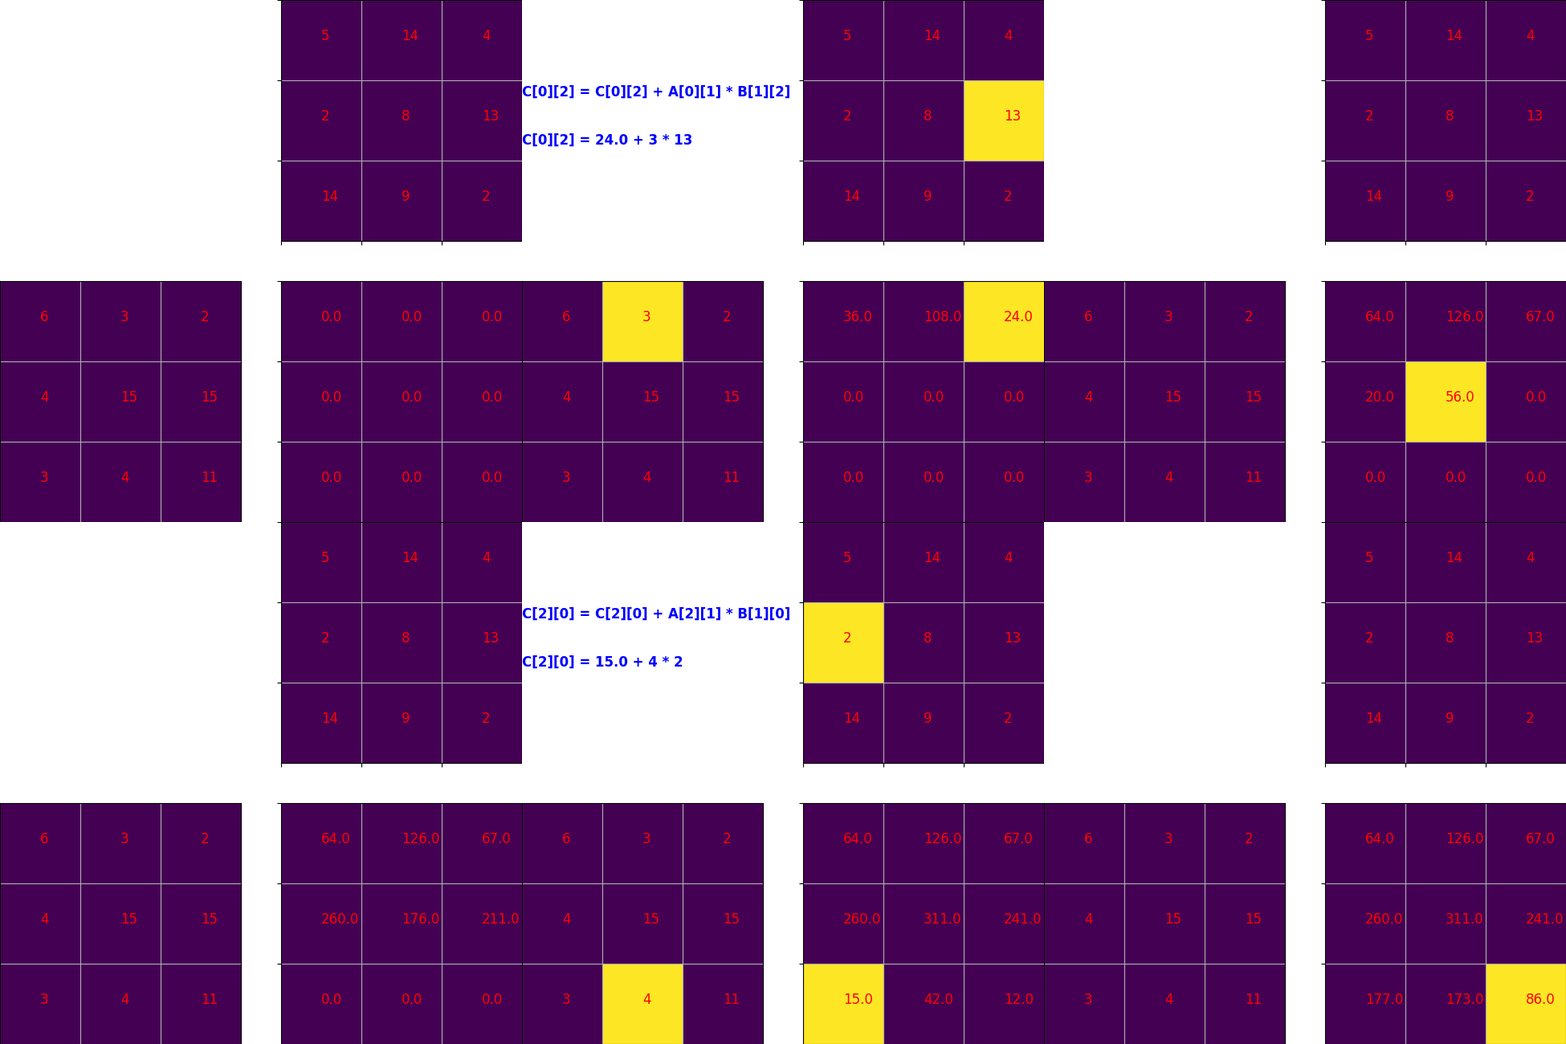
As you can see in the animation, the previous implementation of the matrix multiplication does not expose much locality in its accesses to matrices A and B.
Rather, it exposes locality when accessing matrix C.
We can reorder our nested loops and still get the correct answer.
In fact, all permutations of our three nested loops will result in the same C matrix.
Moreover, when it comes to the complexity of the algorithm itself, reordering the for loops does not change the complexity.
However, reordering the for loops changes the access pattern to the memory.
In turn, it could increase/decrease our cache hit rate.
For this step, you can see a slightly different implementation of the matrix multiplication program below.
You can also find it in workloads/matmul/ikj_multiply.h
void multiply(double **A, double **B, double **C, int size)
{
    for (int i = 0; i < size; i++) {
        for (int k = 0; k < size; k++) {
            for (int j = 0; j < size; j++) {
                C[i][j] += A[i][k] * B[k][j];
            }
        }
    }
}
As you can see, two for loops have been interchanged (j and k) from our previous implementation. The animation below shows how the order of operations during the multiplication operation.

You can import this workload into your configuration script using obtain_resource("mm_ikj_run").
If you need to compile your own binary, you can run the command below in workloads/matmul.
make mm-ikj-gem5
CAUTION: The above command generates a binary that could only be run with gem5. Running these binaries on your host will result in multiple errors.
Blocked matrix multiplication
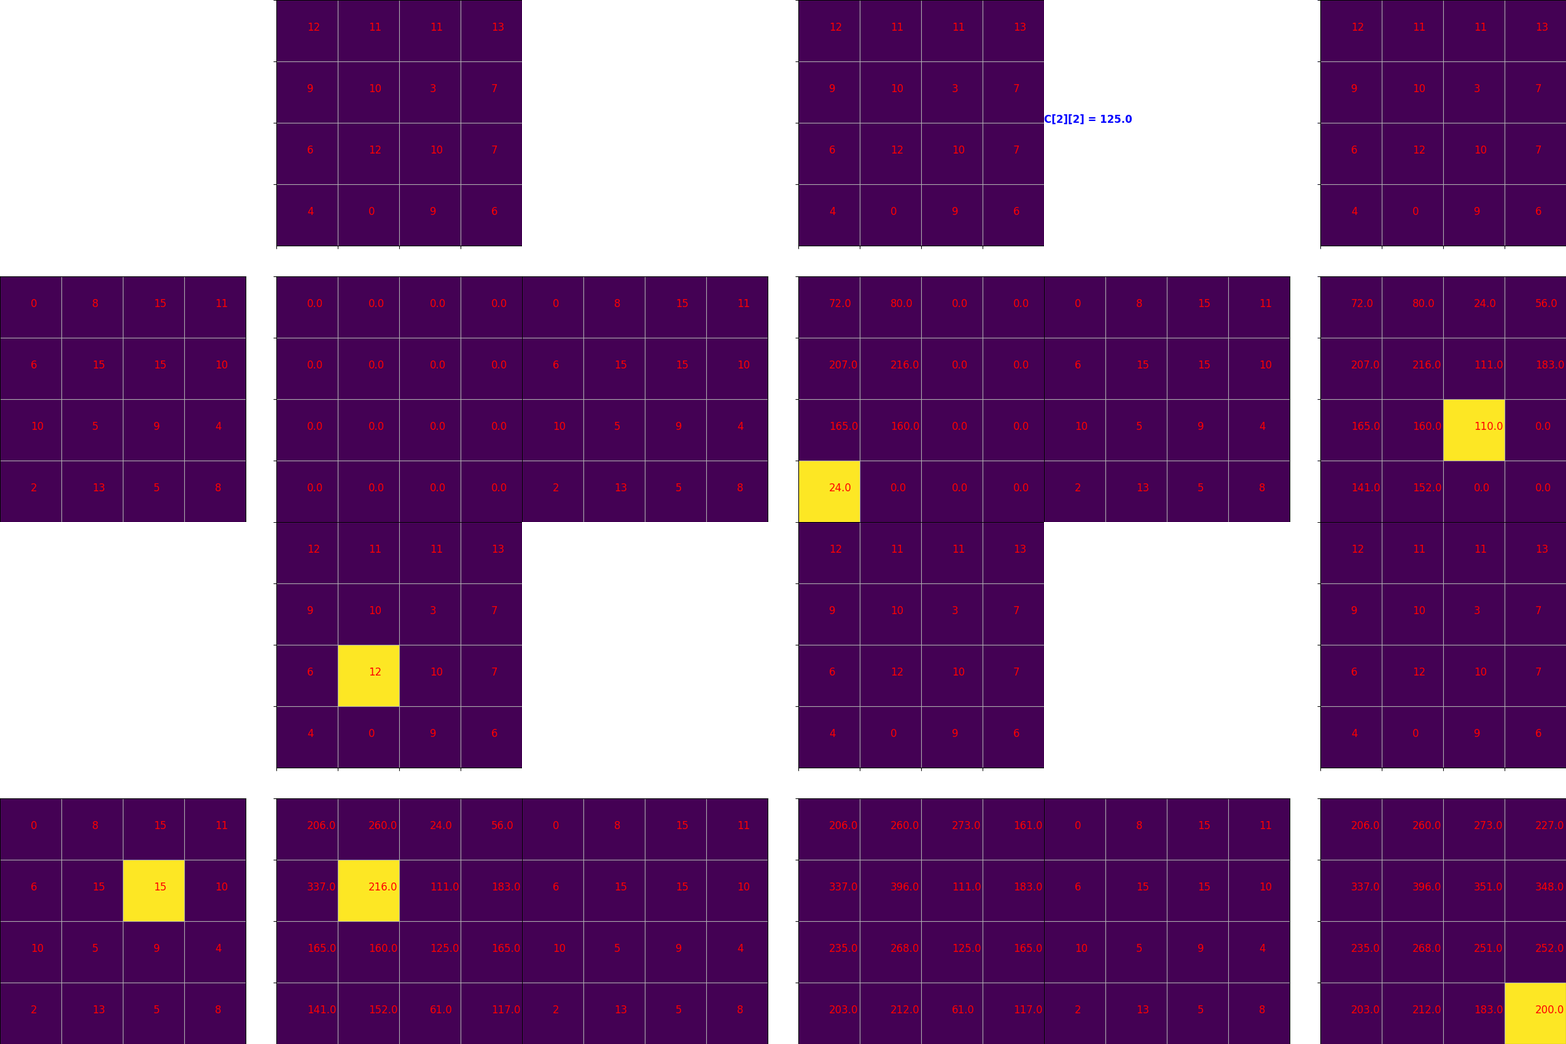
You can improve the cache behavior of matrix multiplication by using a blocked algorithm. In this algorithm, rather than streaming through all of the inputs, you operate on one block at a time. Look at this short article to learn more about the blocking technique used to increase locality in matrix multiplication.
Similar to loop interchange, there are multiple different ways you can choose to block accesses to your matrices in the matrix multiplication algorithm.
One example is shown below where j and k are blocked and i is streamed.

For this assignment, you need to implement three different variants of the blocking scheme.
- Block i and j and implement it as the multiply function in
workloads/matmul/block_ij_multiply.h. After implementation, you can build your binary by running the command below inworkload/matmul.
make mm-block-ij-gem5
After building your binary, you can import it as a workload into your configuration script from workloads/matmul_workload.py as obtain_resource("mm_block_ij_run").
- Block i and k and implement it as the multiply function in
workloads/matmul/block_ik_multiply.h. After implementation, you can build your binary by running the command below inworkload/matmul.
make mm-block-ik-gem5
After building your binary, you can import it as a workload into your configuration script from workloads/matmul_workload.py as obtain_resource("mm_block_ik_run").
- Block j and k and implement it as the multiply function in
workloads/matmul/block_jk_multiply.h. After implementation, you can build your binary by running the command below inworkload/matmul.
make mm-block-jk-gem5
After building your binary, you can import it as a workload into your configuration script from workloads/matmul_workload.py as obtain_resource("mm_block_jk_run").
You will have to pass matrix_size (describes the size of matrices A, B, and C) and block_size (describes the size of the block in your blocking scheme) to the constructor of all the workloads you have implemented.
If you have to run a workload on native hardware (e.g. your host machine), you should pass the same two arguments in the same order in the command line following the name of your binary.
NOTE: You can use the command below in workloads/matmul to create the binaries for all the workloads discussed.
make
CAUTION: The above command generates binaries that can only be run with gem5. Running these binaries on your host will result in multiple errors.
Testing your blocked implementation
To test your blocked implementation you may want to run it on your local machine (or on the codespace you’re using). To do this, see Running on native hardware below.
Experimental setup
In this assignment, we will investigate the effect of caching on overall performance.
We have already looked at how software implementation can help improve caching in matrix multiplication.
Regarding hardware models, we will use different cache hierarchies to see the effect of cache size and latency on the performance.
Under the components directory, you will find modules that define the different models that you should use in your configuration scripts.
- Board models: You will use the
RISCVBoard. - Board models: You will use the
OutOfOrderCPU. This component uses the O3CPU with all the default parameters. - Cache models: You can find all the models you need to use for your cache hierarchy under
components/cache_hierarchies.py.
You can find three models for your cache hierarchy.
They all have an L2 cache with size of 128 KiB.
They also have the same L1I cache.
However, there are different L1D cache designs.
You can find a short description of each L1D design below.
- LargeCache: a
64 KiBL1D cache. - MediumCache: a
32 KiBL1D cache. - SmallCache: a
16 KiBL1D cache.
Make sure you understand their similarities and differences.
- Memory models: You will use the
DDR4memory. - Clock frequency: You can use a clock frequency of
2 GHzfor all of your simulations.
The experiments
As part of your analysis and simulation, you will have to run your workloads on both real hardware and gem5. Before running any workloads, you should develop your hypotheses as to what the performance will be. Specifically, the main thing that is changing will be the hit rate in the L1 caches. You can estimate the hit rate by estimating the active working set size and comparing it to the cache size. Working set size is the number of bytes that have to be moved between the processor and the memory subsystem.
Step I: Working set sizes
In your report answer the following questions.
- What is the working set size for the matrix multiply application?
Describe the working set size as a function of
matrix_sizeand the size of a doubledouble_size. Plug in 128 asmatrix_sizeand 8 asdouble_sizeand calculate the working set size. Give both the answer and the equation you used to calculate it. - For each of the three blocking configurations, what’s the active working set for multiplying one block?
Describe the working set size as a function of
matrix_size,block_size, anddouble_size. Plug in 128 asmatrix_size, 8 asblock_size, and 8 asdouble_size. - Given your answers, for the “SmallCache” that is 16 KiB, which implementation do you think will perform the best?
For these questions, you can assume the cache line size is 64 bytes.
Step II: Simulation and performance comparison
For your simulation, create a configuration script that allows you to run any of the workloads with any of the cache hierarchies. For this step:
- Run all the workloads on using the
SmallCachehierarchy.
In your report answer the following questions.
- For
SmallCache, which blocking scheme performs the best? Why?
Use a matrix_size of 128 and a block_size of 8 for all your simulations.
Hints: In your answer use cache-related statistics such as hit rate.
Moreover, think of how average memory access time (AMAT) could help you explain your results.
I also recommend thinking about how the access pattern could influence memory access time.
The stats that are most useful will be:
board.cache_hierarchy.ruby_system.l1_controllers.L1Dcache.m_demand_hitsboard.cache_hierarchy.ruby_system.l1_controllers.L1Dcache.m_demand_missesboard.cache_hierarchy.ruby_system.l1_controllers.L1Dcache.m_demand_accessesboard.cache_hierarchy.ruby_system.l2_controllers0.L2cache.m_demand_hitsboard.cache_hierarchy.ruby_system.l2_controllers0.L2cache.m_demand_missesboard.cache_hierarchy.ruby_system.l2_controllers0.L2cache.m_demand_accesses
Note: There are four L2 controllers, but they represent different banks of the same cache. The miss ratio should be the same for all of them.
Step III: Comparing cache size effects
Now, run the same workloads on the LargeCache hierarchy.
In your report answer the following questions.
- Which blocking schemes benefit the most from the larger cache?
- Why does the non-blocked implementation not benefit as much from the larger cache?
Next steps (required 201A, extra credit 154B): Running on native hardware
Now, run the matrix multiply workloads on some real hardware (not gem5). Use the codespace to run the experiments.
make all-native
You can also build them separately using the commands below.
make mm-block-ij-native
make mm-block-ik-native
make mm-block-jk-native
Before running your workloads on real hardware, answer the following questions in your report.
- What is the L1/L2/L3 size of the processor you’re running on? (
lscpuor/proc/cpuinfoand Google should help) - Can you use the information about the cache sizes to predict the best-performing block scheme and size?
When running on native hardware, I recommend using matrix_size of at least as big as 256.
After running the workloads on real hardware answer the following question in your report.
- Which blocking scheme and size exhibited the best performance? Why or why not?
- Is this the same as on gem5? Why or why not?
Submission
You will submit this assignment via GitHub Classroom.
- Accept the assignment by clicking on the link provided in the announcement.
- Create a Codespace for the assignment on your repository.
- Fill out the
questions.mdfile. - Commit your changes.
Make sure you include both your runscript, an explanation of how to use your script, and the questions to the questions in the questions.md file.
Explanation of how to use your script
Include a detailed explanation of how to use your script and how you use your script to generate your answers (this will be more applicable in future assignments).
Make sure that all paths are relative to this directory (assignment-4/).
The code included in the “Example command to run the script” section should be able to be copied and pasted into a terminal and run without modification.
- You should include a sentence or two which describes what the script (or scripts) do under “Explanation of the script” in
questions.md. - You should include the path to the script under “Script to run” in
questions.md. - You should include any parameters that need to be passed to the script under “Parameters to script (if any)” in
questions.md. - You should include each command used to gather data under “Command used to gather data” in
questions.md.- Make sure this can by copy-pasted and run in your codespace without modification.
- If you need other files to run your script, make sure to include those files when you commit your changes.
Grading
- 25 points gem5 experiment script and explanation of how to use your script
- 75 points for the questions in the report
- 25 points for the next steps
Academic misconduct reminder
You may discuss high level concepts with others in the class.
Remember, DO NOT POST YOUR CODE PUBLICLY ON GITHUB! Any code found on GitHub that is not the base template you are given will be reported to SJA. If you want to sidestep this problem entirely, don’t create a public fork and instead create a private repository to store your work.